wearables · free-pattern · beginner · 6 min read
Crochet Bucket Hat Pattern (Adult Sizes, One Skein)
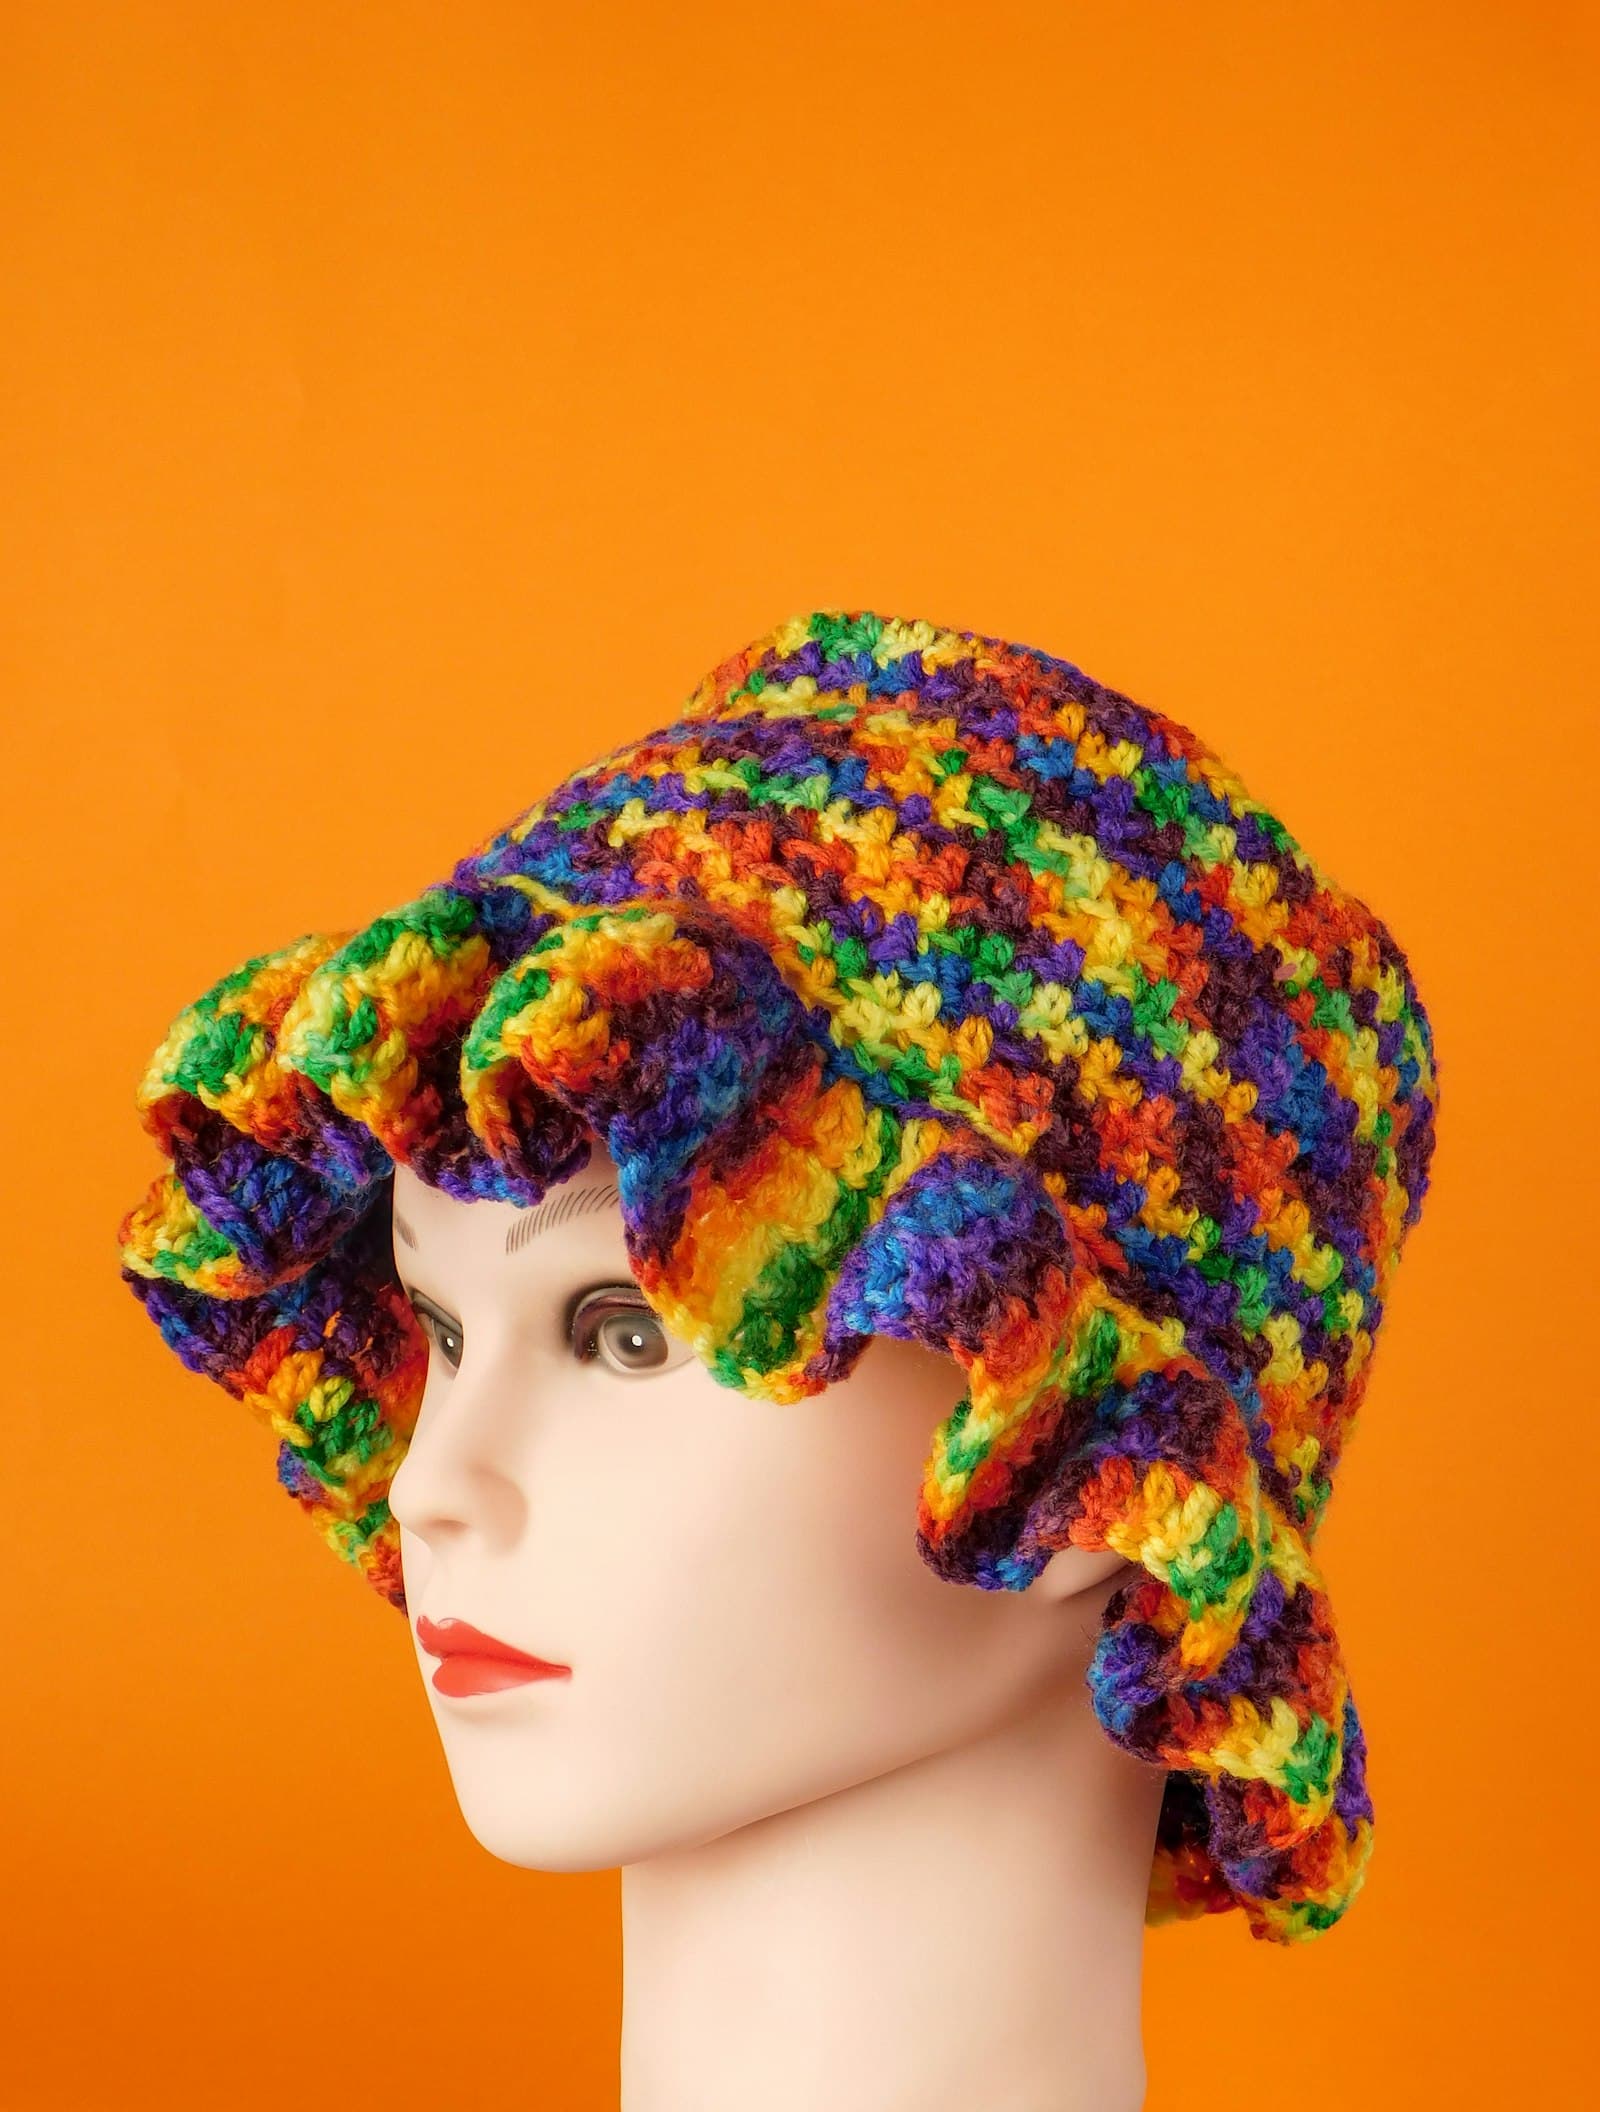
Bucket hats are everywhere again, and the crochet version is genuinely one of the more forgiving garment-adjacent projects: no sizing math beyond a head measurement, no set-in sleeves, and every mistake in the crown shows up immediately as a wave or a cup instead of hiding until you've finished the whole thing. This pattern is worked in one continuous piece — crown, sides, brim — so there's no seaming at the end.
Materials
- Worsted weight yarn (US #4), about 180–220 yards depending on head size
- 5.0mm (US H-8) crochet hook
- Stitch marker
- Yarn needle
- A tape measure
Abbreviations
- ch — chain
- sc — single crochet
- inc — increase (2 sc in the same stitch)
- st(s) — stitch(es)
- BLO — back loop only
Gauge
Gauge matters more here than on most quick projects, because the crown's stitch counts are built around it. At 4 stitches and 4 rows per inch in single crochet with the yarn and hook above, the crown below finishes at roughly 7.5 inches across — a standard adult head. If your gauge runs looser or tighter, the finished crown will scale with it; measure the crown flat against your own head after round 9 and add or skip an increase round before moving on if it's noticeably off.
Part 1: the crown
Worked flat-circle style, the same increase math as a basic flat circle — 6 more stitches every round, which is what keeps it lying flat instead of cupping or rippling.
Round 1. Magic ring, 6 sc into the ring. (6 sts) Round 2. Inc in each st around. (12 sts) Round 3. Sc 1, inc around. (18 sts) Round 4. Sc 2, inc around. (24 sts) Round 5. Sc 3, inc around. (30 sts) Round 6. Sc 4, inc around. (36 sts) Round 7. Sc 5, inc around. (42 sts) Round 8. Sc 6, inc around. (48 sts) Round 9. Sc 7, inc around. (54 sts)
Lay the crown flat and check it against your head — it should sit right at the crown of your head with the edge landing just above your ears. For a smaller head, stop at round 8; for a larger one, add round 10 (sc 8, inc around, 60 sts) before continuing.
Part 2: the sides
No more increasing here — every round is the same stitch count as the last round of the crown, worked straight down to form the sides of the hat.
Rounds 10–15 (or until sides measure 3.5–4 inches deep): Sc in each st around, join with sl st to first sc if working in joined rounds, or continue in a true spiral with a stitch marker moved up each round.
Part 3: the brim
This is the part that actually makes it a bucket hat instead of a beanie — a burst of increases that flares the fabric outward instead of continuing straight.
Round 16. Sc across 6 sts, then work an increase (2 sc) in the next st, and repeat that 7-stitch group all the way around. (Stitch count grows by roughly 1/7 — exact count depends on how many stitches you ended part 2 with. Keep the same stitch marker at the start of the round so you can tell where each repeat begins.)
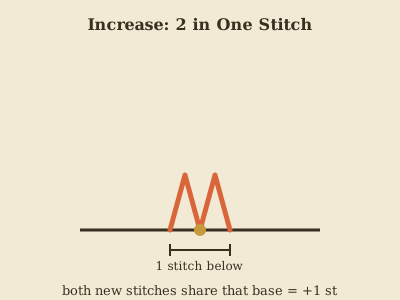 Round 17. Same idea, one stitch wider per group: sc across 7 sts, then inc in the next st, repeating around. The flare should already be noticeably wider than the straight sides below it.
Round 18. Sc across 8 sts, then inc in the next st, repeating around. This is the last increase round — check that the brim is lying flat rather than rippling before moving on, since a rippled brim usually means one round had an extra increase repeat squeezed in.
Round 19. Sc in each st around, working BLO (back loop only) for this round only, rather than the usual both-loops sc. Working into just the back loop leaves the front loop exposed as a visible ridge, and that ridge is what gives the brim a hinge to fold along instead of curving randomly.
Round 20. Sc in each st around, back to both loops as normal. This final round settles the fabric below the fold crease and gives the brim's outer edge a clean, finished line.
Round 17. Same idea, one stitch wider per group: sc across 7 sts, then inc in the next st, repeating around. The flare should already be noticeably wider than the straight sides below it.
Round 18. Sc across 8 sts, then inc in the next st, repeating around. This is the last increase round — check that the brim is lying flat rather than rippling before moving on, since a rippled brim usually means one round had an extra increase repeat squeezed in.
Round 19. Sc in each st around, working BLO (back loop only) for this round only, rather than the usual both-loops sc. Working into just the back loop leaves the front loop exposed as a visible ridge, and that ridge is what gives the brim a hinge to fold along instead of curving randomly.
Round 20. Sc in each st around, back to both loops as normal. This final round settles the fabric below the fold crease and gives the brim's outer edge a clean, finished line.
Fasten off, leaving a 6-inch tail. Weave in both ends.
Getting the brim to actually flip up
A bucket hat's brim is only as good as its stiffness — a limp brim just droops. Three things fix a floppy brim: a firmer yarn (cotton or cotton-blend holds a fold much better than soft acrylic), a half size smaller hook than the pattern calls for on the brim rounds specifically (denser fabric = more structure), and the BLO crease round above, which gives the fold a hinge to fold along instead of curving randomly.
Customizing the fit and look
- Smaller/larger crown: stop the crown increases one round earlier or later (see Part 1), which shifts every later round's stitch count with it.
- Deeper sides: add rounds in Part 2 in pairs, checking depth against a tape measure rather than a fixed round count.
- Wider brim: repeat Round 18's increase pattern for a second round before moving to the BLO crease round.
- Color blocking: switch colors at any round boundary using an invisible color join so the transition doesn't leave a visible jog.
Frequently Asked Questions
Why is my bucket hat crown cupping instead of lying flat? A cupping crown almost always means too many increases for the round you're on — check your stitch counts against the pattern at each round rather than only at the end, since one missed increase early compounds every round after it. A crown that's rippling with wavy edges is the opposite problem: too many increases, which is easy to fix by pulling back to the last correct round and re-checking the count.
What yarn weight makes the best bucket hat? Worsted weight (US #4) with a firm-structure fiber — cotton, cotton-acrylic blends, or a sturdy acrylic — holds the brim's shape far better than a soft, drapey yarn like a superwash merino, which tends to make the whole hat flop rather than hold its bucket silhouette.
Can I make this pattern for a child? Yes — stop the crown at round 7 or 8 (check the flat measurement against a child's head, roughly 6–6.5 inches across for most kids), work fewer rounds in Part 2 for shorter sides, and the brim proportions in Part 3 scale down naturally with the smaller stitch count.
Once the increase-round rhythm here feels automatic, the corner-to-corner technique is a good next stretch — a completely different way of building fabric that still comes down to the same "count carefully every row" discipline.
Keep going
- 01Crochet Wrist Warmers Pattern (Ribbed, One Skein, Both Sizes)A stretchy ribbed rectangle, seamed into a tube with a gap left for the thumb — the layering piece that's trending everywhere this year, worked flat so there's no in-the-round thumb gusset math to fight with.wearables5 min read
- 02Easy Crochet Slippers Pattern (Adult Sizes)No shaping, no sizing charts — just two rectangles folded and seamed into a slipper, sized against your own foot instead of a generic chart that never quite fits.wearables5 min read
- 03Crochet Baby Booties Pattern (Newborn to 6 Months)A stretchy ribbed cuff, a simple sole, and a button — the pattern that turns 20 minutes and a handful of leftover yarn into a baby-shower-worthy gift.wearables5 min read