free-pattern · home-decor · beginner · 5 min read
Simple Crochet Flower Applique Pattern (5 Minutes Each)
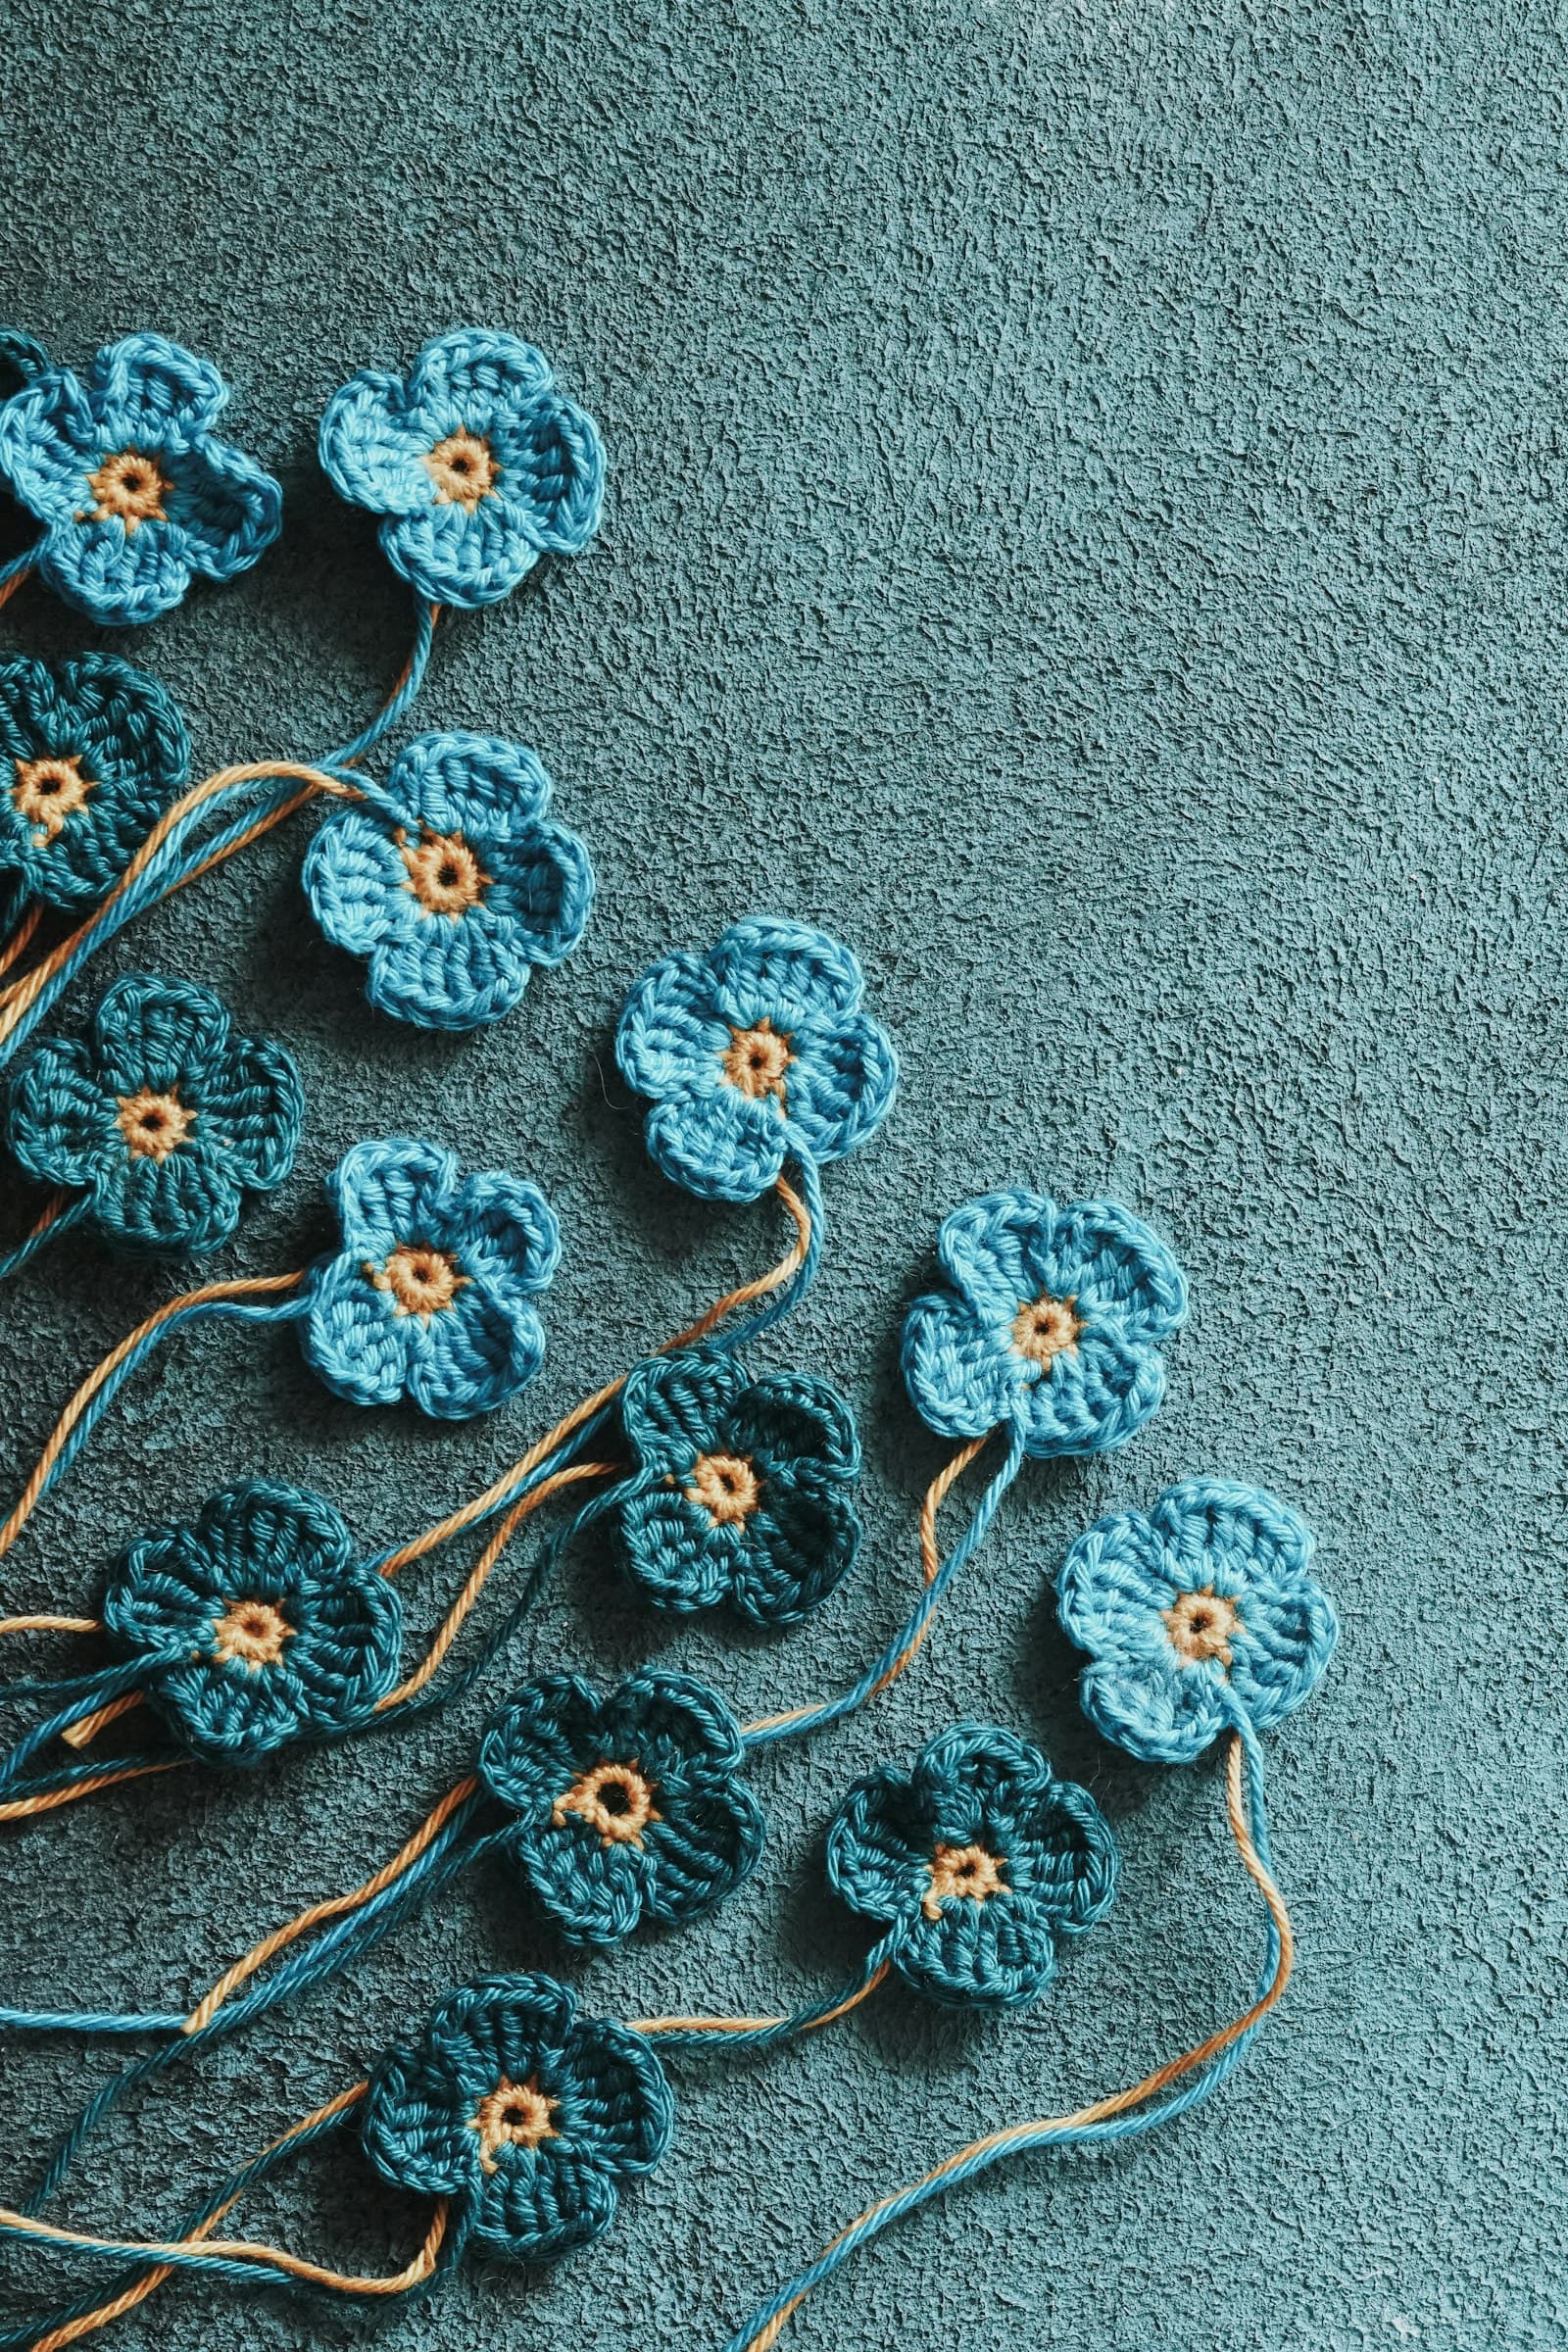
A flower appliqué is the pattern to keep in your back pocket once you've got a few projects under your belt — it doesn't stand alone, but it upgrades almost everything else on this site. Sewn onto the headband, a corner of the baby blanket, or a plain tote bag, one small flower changes a plain project into a finished-looking one.
Abbreviations
- ch — chain
- sl st — slip stitch
- sc — single crochet
- dc — double crochet
- tr — treble crochet
- st(s) — stitch(es)
Materials (per flower)
- Small amounts of worsted weight yarn — a contrast color for the center, main color for petals
- 4.0mm (US G-6) hook
- Yarn needle
The flower, round by round
Center (contrast color). Magic ring, chain 1, work 10 sc into the ring, then join with a slip stitch to the first sc to close the round. (10 sts) Fasten off, leaving a short tail for weaving in only, not for sewing — the petals get their own long tail for that later.
Petals (main color). Join the main color in any stitch of the center round. Each petal is built in three short moves, repeated 5 times around the 10-stitch center. First, chain 3 and slip stitch into the next unworked stitch — this anchors the base of the petal and moves you one stitch along. Second, chain 3 again, then work dc, tr, tr, dc all into that same stitch you just slip-stitched into; this cluster of four tall stitches is what fans out into the rounded petal shape. Third, chain 3 once more and slip stitch into the following stitch to close off the petal and set up for the next one. Repeat this three-part sequence 5 times total, using 2 of the center's 10 stitches per petal, for 5 petals total. Fasten off, leaving a long tail for sewing the finished flower onto a project.
If that all-in-one round reads as dense on a first try, work it more simply instead: skip 1 st, (dc, tr, tr, dc) all in next st, skip 1 st, sl st in next st repeated 5 times around — a slightly flatter petal shape with the same 5-petal count, easier to keep track of mid-round.
Finishing
Weave in the center's tail on the back of the flower. Use the petals' long tail to sew the flower directly onto your project, catching only the back layer of fabric so the stitches don't show through on the front. A few stitches through the very center of the flower, catching the center round and the project fabric together, hold it flattest.
Variations
- Bigger flower: work a second round of petals behind the first, in a third color, offset so the back petals peek out between the front ones — a fuller, layered look for the same skill level.
- Different center: a small pom-pom or a button sewn into the center instead of the crocheted circle gives a different texture contrast.
- As a standalone accessory: a flower with a pin back or a jump ring glued to the reverse becomes a brooch or a keychain charm with no changes to the pattern itself.
- Fewer or more petals: the 10-stitch center divides evenly into 5 petals at 2 stitches each. A 12-stitch center (one extra increase round before switching colors) divides into 6 petals instead, for a slightly fuller-looking flower with the same construction.
Where to use them
A single flower dresses up a plain project far more than the five minutes of work suggests. Sewn at the corner of the baby blanket, it reads as an intentional design choice rather than an afterthought. A row of three or four along a headband's seam, or scattered across the front of a tote bag, turns a functional accessory into something that looks store-bought. Because each flower is small and finishes fast, it's also one of the few embellishments worth making a few extra of "just in case" — a spare flower is easy to store and rarely goes to waste.
Color pairing notes
The center and petals don't need to match anything else in the project they're joining — a flower in a genuinely contrasting color reads as a deliberate accent, while a flower in the same color family as its background can disappear into the fabric instead of standing out. If you're unsure, pick the center color first (it's the smaller, more visible detail up close) and choose petals a shade or two lighter or darker than the background fabric, rather than an exact match.
This flower uses the same magic-ring start as every amigurumi piece on this site — if the ring itself is still new, the magic ring tutorial covers the two-handed motion in full.
Frequently Asked Questions
How do I stop the flower from looking flat or floppy? A slightly heavier yarn weight than the project it's attached to, or a light starch spray on the finished flower before sewing it on, both add enough body to keep the petals from folding flat against the surface.
Can I make these flowers without a magic ring? Yes — a chain-4 joined into a ring with a slip stitch works as a substitute start, with a small hole at the center that's easily hidden by the following petal round.
How many flowers does a typical embellishment project need? A single accent flower is often enough for a headband or bag corner; a cluster of 3–5 in varying sizes reads as a deliberate bouquet motif rather than a single decoration, which is a common choice for a blanket corner or a larger tote bag.
Keep going
- 01Halloween Monster Mug Cozy Pattern (One-Eyed and Friendly)The same ribbed tube as the everyday mug cozy, dressed up with a googly eye, two felt fangs, and a pair of horns — a seasonal novelty piece that finishes in under an hour.home-decor6 min read
- 02Crochet Keychain Pattern (Scrap Yarn, 15 Minutes)A tiny amigurumi ball, a flower, or a simple tassel — three keychain bases that each finish in under 20 minutes and turn a keyring into a genuine handmade gift.free-pattern6 min read
- 03Easy Cotton Dishcloth Pattern (A Perfect First Project)Nine inches of cotton, one stitch repeated, two evenings tops. The dishcloth is the traditional first crochet project for good reason — here's the pattern plus every trick for a square, even one.home-decor6 min read