amigurumi · free-pattern · beginner · 10 min read
Crochet Raccoon Pattern (Amigurumi, 7–8in)
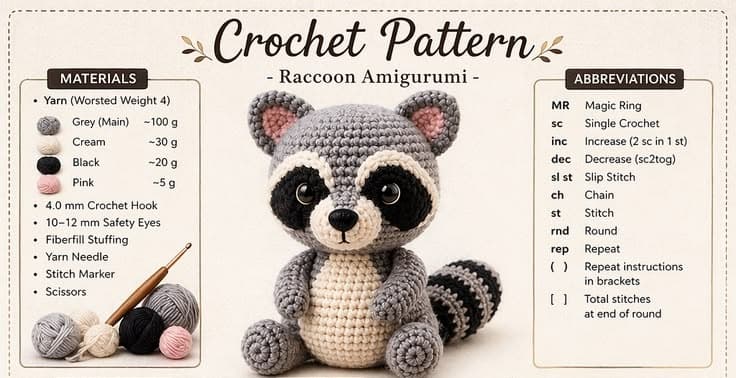
This raccoon shares the same magic-ring shaping as the amigurumi panda, but adds three techniques that panda pattern doesn't touch: a body worked bottom-up with a color change built into the middle of the piece (no separate belly patch to sew on), a tail striped in alternating color bands as you go, and oval eye masks started from a foundation chain rather than a magic ring. None of it is difficult on its own — it's just more construction variety packed into one beginner-friendly project.
Abbreviations
- MR — magic ring
- sc — single crochet
- inc — increase (2 sc in 1 stitch)
- dec — decrease (sc2tog)
- sl st — slip stitch
- ch — chain
- st — stitch
- rnd — round
- rep — repeat
- ( ) — repeat the instructions inside the parentheses the number of times given
- [ ] — total stitch count at the end of the round
Materials
- Worsted weight (4) yarn: grey (main, ~100g), cream (~30g), black (~20g), pink (~5g)
- 4.0mm crochet hook
- 10–12mm safety eyes
- Polyester fiberfill stuffing
- Yarn needle
- Stitch marker
- Scissors
Body (bottom-up, grey)
Work in continuous rounds, starting from the bottom of the body and building upward toward the neck.
- Magic ring, 6 sc into the ring. (6)
- Inc around. (12)
- (sc, inc) x 6. (18)
- (2 sc, inc) x 6. (24)
- (3 sc, inc) x 6. (30)
- (4 sc, inc) x 6. (36) — the body's widest point. 7–10. Sc around, no increases. (36) — repeat for 4 rounds.
Switch to cream yarn.
11–12. Sc around, no increases. (36) — repeat for 2 rounds. This cream band becomes the raccoon's pale belly, built directly into the body rather than sewn on afterward as a separate patch.
Switch back to grey yarn.
- (4 sc, dec) x 6. (30) — sc across 4 stitches, then work a decrease over the next 2 to merge them into one; repeat 6 times.
- (3 sc, dec) x 6. (24)
- (2 sc, dec) x 6. (18)
Stuff firmly, packing more in as the opening narrows.
- (sc, dec) x 6. (12)
- Dec around. (6)
Close and fasten off.

Head (grey)
- Magic ring, 6 sc into the ring. (6)
- Inc around. (12)
- (sc, inc) x 6. (18)
- (2 sc, inc) x 6. (24)
- (3 sc, inc) x 6. (30)
- (4 sc, inc) x 6. (36)
- (5 sc, inc) x 6. (42) — the head's widest point. 8–11. Sc around, no increases. (42) — repeat for 4 rounds.
Insert the safety eyes now, between rounds 9 and 10, spaced about 7 stitches apart — early enough that you can still reach through the opening comfortably to attach the backing washers.
- (5 sc, dec) x 6. (36)
- (4 sc, dec) x 6. (30)
- (3 sc, dec) x 6. (24)
Stuff firmly.
- (2 sc, dec) x 6. (18)
- (sc, dec) x 6. (12)
- Dec around. (6)
Close and fasten off.
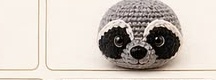
Ears (make 2: outer grey + inner pink)
Outer (grey):
- Magic ring, 6 sc into the ring. (6)
- Inc around. (12)
- (sc, inc) x 6. (18)
- Sc around, no increases. (18)
Fasten off.
Inner (pink):
- Magic ring, 6 sc into the ring. (6)
- Inc around. (12)
- (sc, inc) x 6. (18)
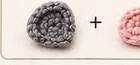
Fasten off. The inner pink piece finishes one round smaller than the outer grey piece, which is what lets it nest inside the outer ear as a flat lining rather than needing to be stretched to fit. Leave both pieces flat and unstuffed, then sew the pink piece centered on top of the grey piece before attaching the combined ear to the head.
Arms (make 2, grey)
- Magic ring, 6 sc into the ring. (6)
- Inc around. (12) 3–5. Sc around, no increases. (12) — repeat for 3 rounds.
- (sc, dec) x 6. (6)
Lightly stuff — a softly filled arm sits and drapes more naturally against the body than a firmly packed one. Flatten and close.

Legs (make 2, grey)
- Magic ring, 6 sc into the ring. (6)
- Inc around. (12)
- (2 sc, inc) x 4. (16) 4–6. Sc around, no increases. (16) — repeat for 3 rounds.
- (2 sc, dec) x 4. (12)
Stuff firmly this time, since the legs need to hold their shape and support the raccoon in a seated pose. Flatten and close.

Tail (start with grey)
- Magic ring, 6 sc into the ring. (6)
- Inc around. (12)
- (sc, inc) x 6. (18)
From here, work straight rounds in alternating 2-round color stripes — black, grey, black, grey, black, grey — for 2 rounds per color, continuing until the tail reaches the length shown in the photo. Carry the color you're not currently using loosely up the inside of the tail rather than cutting and rejoining it every 2 rounds, which saves you six separate ends to weave in later.
Once the stripe sequence is finished:
- (sc, dec) x 6. (12)
- Dec around. (6)
Stuff firmly. Close and fasten off.

Eye masks (make 2, black)
Chain 5 to start.
- Starting in the 2nd chain from the hook: sc, sc, 3 sc in the last chain (this rounds off one end), then work back along the other side of the foundation chain: sc, sc, 2 sc in the last stitch (rounding off the other end and closing the oval). (9)
- Increase at both rounded ends of the oval while working single crochet straight along the two long sides, ending with 15 stitches total.
- Sc around, no increases. (15)
Fasten off, leaving a long tail for sewing. Sew the eye masks onto the face before inserting the safety eyes, positioning each mask so the eye will sit roughly centered once it's pushed through both the mask and the head.

Muzzle (cream)
- Magic ring, 6 sc into the ring. (6)
- Inc around. (12)
- Sc around, no increases. (12)
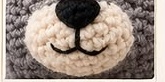
Fasten off, leaving a long tail. Sew the muzzle between the eyes, low on the face — it stays flat and unstuffed, the same lightly domed shape you'll see once it's embroidered.

Nose & mouth
Embroider a small triangle nose in black yarn onto the muzzle, then add a short vertical stitch straight down from the point of the triangle and a smile curving out from the bottom of that line to each side.
Assembly
- Sew the head to the body.
- Sew the ears on top of the head.
- Sew the arms to the sides of the body, at about the height of rounds 3–4 of the body.
- Sew the legs to the bottom front of the body, at about the height of rounds 1–2.
- Sew the tail to the lower back.
- Sew the eye masks onto the face, then insert the safety eyes through both the masks and the head.
- Sew the muzzle in place and embroider the nose and mouth.
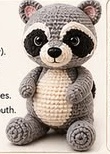
Finished size
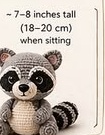
This raccoon finishes at approximately 7–8 inches (18–20cm) tall when seated, worked in worsted weight (4) yarn on a 4.0mm hook.
Tips for beginners
- Work in continuous rounds throughout — don't join or turn, just keep spiraling.
- Use a stitch marker to mark the first stitch of every round; it's easy to lose your place on longer pieces like the body and head.
- Stuff as you go for the best shape, rather than trying to pack everything in at the very end through a small opening.
- Count your stitches at the end of every round, especially through the increase and decrease sections.
- Crochet tightly enough that the stuffing doesn't show through the fabric between stitches.
- Use pins to hold pieces in place before sewing, so you can check placement and symmetry before committing with a needle.
If magic rings or invisible decreases are new to you, the magic ring tutorial and the amigurumi bunny pattern both cover the same techniques in more detail on simpler single-color pieces.
Frequently Asked Questions
Why does the body use a color change instead of a separate sewn-on belly patch? Switching yarn colors mid-piece for rounds 11–12 keeps the belly stripe perfectly centered and removes one seam from the project — there's no separate patch to cut out, shape, and stitch on evenly afterward. The trade-off is two yarn ends to weave in at the color-change points instead of none.
Can I make the tail without changing colors every 2 rounds? Yes — a solid grey or solid black tail works fine structurally; you'll just lose the raccoon's signature banded-tail look. If you'd rather change colors less often, work 3–4 rounds per stripe instead of 2 for a similar effect with fewer color switches.
How much yarn does a raccoon like this use in total? Roughly 100g of grey, 30g of cream, 20g of black, and 5g of pink at this finished size — the grey dominates since it covers the body, head, arms, legs, ear backs, and half the tail.
Is this pattern beginner-friendly, or does the color-work make it harder? It's still beginner-friendly. Every color change happens between full rounds (or between separate pieces, in the case of the ears and eye masks), never mid-stitch, so there's no intarsia or stranded color-work technique to learn — just careful yarn switching at clean round breaks.
Are safety eyes okay to use if the raccoon is for a young child or a pet? Safety eyes are a choking hazard for children under 3 and for pets that chew on toys. For either, substitute embroidered eyes in black yarn or floss, sewn securely with several passes through the head before stuffing is complete.
Keep going
- 01Crochet Panda Pattern (Sitting Amigurumi, 18–20cm)A bigger, more detailed panda than most beginner patterns — a two-tone head with eye patches, a separate nose, and toe-pad paws that make it sit up on its own. Single crochet throughout, worsted weight yarn.amigurumi11 min read
- 02Crochet Penguin Pattern (Beginner Friendly, Chenille Yarn)A soft, plush penguin made in chenille yarn instead of the usual worsted cotton — the head and body work as one continuous piece, so there's no seam down the middle to line up.amigurumi9 min read
- 03Crochet Bucket Hat Pattern (Adult Sizes, One Skein)The rounded crown, straight sides, and flared brim that make a bucket hat instantly recognizable — worked flat-to-flare in single crochet, with the stitch counts spelled out so it actually turns out symmetrical.wearables6 min read