home-decor · free-pattern · beginner · 6 min read
Crochet Coaster Set Pattern (Set of 4 in an Evening)
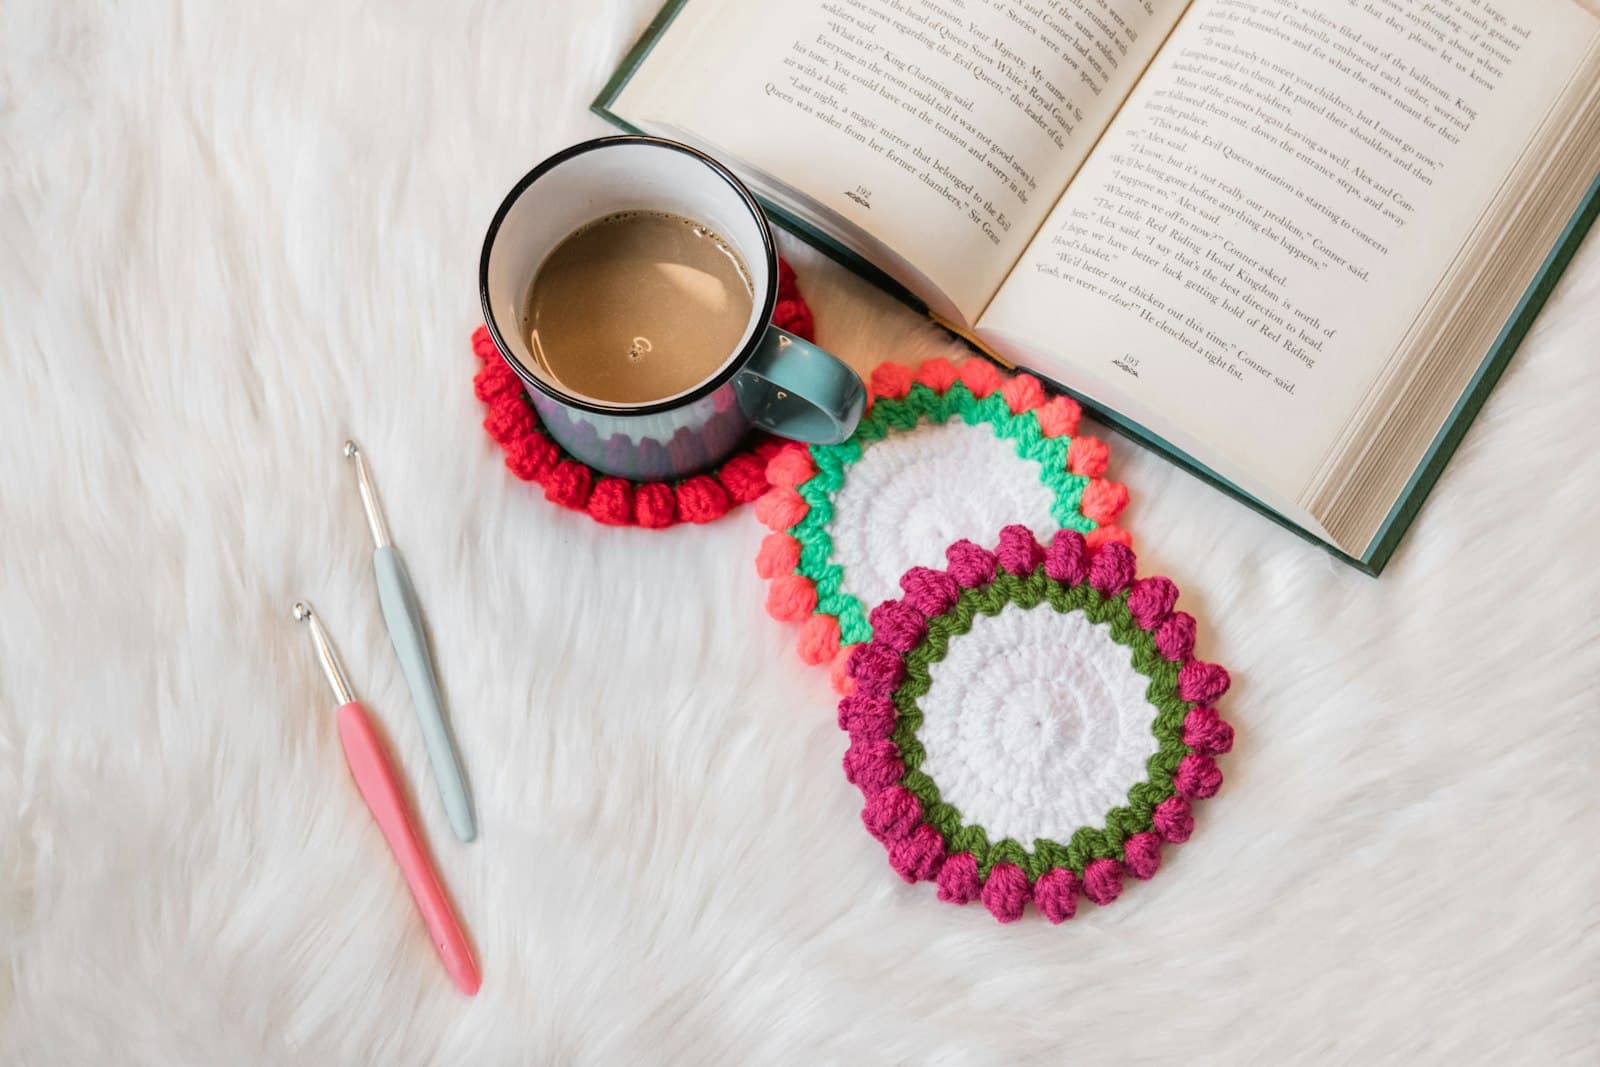
Coasters are the pattern that makes a scrap-yarn stash feel less like clutter and more like a plan — one main color for the body of each coaster, a contrast color for the border, and four coasters is an evening's work rather than a weekend's. This version uses a simple round base with an easy shell-stitch border; the bobble-edged coasters pictured above use the same structure with a fancier border stitch, which the variation notes at the end cover.
Abbreviations
- ch — chain
- sl st — slip stitch
- sc — single crochet
- dc — double crochet
- inc — increase (2 sc in same stitch)
- st(s) — stitch(es)
Materials (per coaster)
- Worsted weight cotton yarn, main color — cotton is the right fiber here since coasters meet condensation and spills constantly and needs to survive washing
- A small amount of a contrast color, for the border
- 4.0mm (US G-6) hook
- Yarn needle
Gauge
Not critical — a coaster's exact diameter isn't load-bearing — but this pattern produces a coaster of roughly 4 inches across at this gauge.
The base (main color)
- Magic ring, 6 sc into ring, then pull the tail to close. (6 sts)
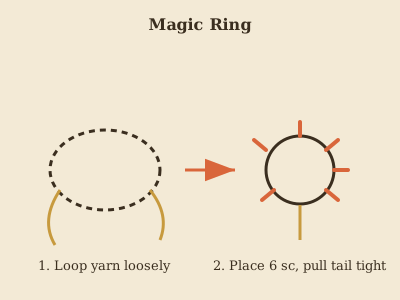
- Inc in every stitch around: work 2 sc into each of the 6 stitches. (12 sts)
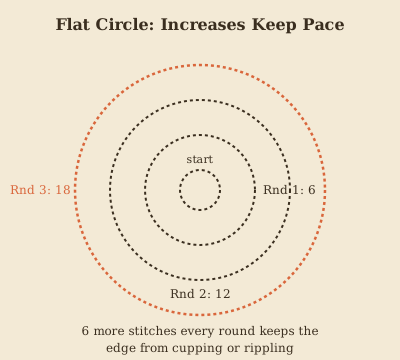
- sc 1, inc in next st around, repeating that two-stitch sequence 6 times total. (18 sts)
- sc 2, inc in next st around, repeating that three-stitch sequence 6 times total. (24 sts)
- sc 3, inc in next st around, repeating that four-stitch sequence 6 times total. (30 sts) Spacing the increases one stitch farther apart each round, rather than repeating the same spacing, is what keeps the circle lying flat instead of cupping or rippling.
Fasten off, leaving a short tail to weave in — don't cut the working yarn if you're adding the border in the same color, only if you're switching to a contrast color next.
Check that the circle lies flat at this point, before adding a border. If it's cupping like a bowl, you've increased too much for your tension — skip an increase or two on the next coaster. If it's rippling with a wavy edge, you've increased too little — add one more increase round before the border.
The border (contrast color)
Join the contrast color in any stitch around the outer edge.
Round 6. Chain 1, sc in the same stitch as the join and in every stitch around — one plain round with no increases, to give the shell stitches of the next round an even, settled base to sit on. Join with sl st to the first sc. (30 sts)
Round 7 (shell border). Chain 1 (does not count as a stitch). Skip 1 st, work 5 dc all into the next st, skip 1 st, sl st in the next st — repeat this four-part sequence around the whole coaster. Skipping a stitch on either side of each shell is what lets the 5 dc fan out into a scallop instead of bunching up; the sl st in between anchors each shell before starting the next one. Join with sl st to the first stitch of the round. The result should look like a ring of evenly spaced fan shapes around the coaster's edge.
Fasten off, weave in every tail.
Making a matching set
Crochet all four bases first, in whatever four colors you have enough scrap yarn for, then do all four borders in a single unifying contrast color (or vice versa — one shared base color, four different border colors). Either approach reads as an intentional set rather than four unrelated coasters, for the cost of zero extra planning.
Variation: bobble border
For the fuller, more textured border style, replace Round 7's shell stitch with a bobble stitch instead. Skip 1 stitch, then build one bobble in the next stitch: (yarn over, insert the hook in the stitch, yarn over, pull up a loop, yarn over, pull through 2 loops) worked 4 times into that same stitch, leaving 5 loops on the hook, then yarn over and pull through all 5 loops at once to close the bobble. Slip stitch in the next stitch to anchor it, then repeat the whole skip-bobble-slip-stitch sequence around. It's a slower round to work than the shell border, with more steps per repeat, but it produces a rounder, more dimensional bump instead of a flat fan shape.
Coasters are also the cheapest place to practice the exact ribbing and shaping skills the mug cozy and larger projects rely on — if a set of these goes together easily, a mug cozy is a natural next step.
Frequently Asked Questions
Why is cotton yarn recommended instead of acrylic for coasters? Cotton absorbs condensation without holding onto moisture the way acrylic can, dries faster between uses, and tolerates the repeated washing coasters need far better over time. Acrylic works in a pinch but tends to look worn and slightly matted after a few months of daily use.
My coaster is cupping slightly in the middle — did I do something wrong? A very slight dome is normal and usually flattens under the weight of a mug, but a pronounced cup means the base needed one more increase round before starting the border. The flat circle guide covers the exact fix.
Can I make a set that matches an existing tablecloth or kitchen color scheme? Yes — since the base and border are separate color choices, matching an existing color scheme is just a matter of picking a main color from your kitchen palette and a border color that complements rather than clashes with it, the same logic as picking any two coordinating paint colors.
Keep going
- 01Halloween Monster Mug Cozy Pattern (One-Eyed and Friendly)The same ribbed tube as the everyday mug cozy, dressed up with a googly eye, two felt fangs, and a pair of horns — a seasonal novelty piece that finishes in under an hour.home-decor6 min read
- 02Crochet Keychain Pattern (Scrap Yarn, 15 Minutes)A tiny amigurumi ball, a flower, or a simple tassel — three keychain bases that each finish in under 20 minutes and turn a keyring into a genuine handmade gift.free-pattern6 min read
- 03Easy Cotton Dishcloth Pattern (A Perfect First Project)Nine inches of cotton, one stitch repeated, two evenings tops. The dishcloth is the traditional first crochet project for good reason — here's the pattern plus every trick for a square, even one.home-decor6 min read